Prairie Grass Observatory logo

Prairie Grass Observatory
New Dome

Camp Cullom
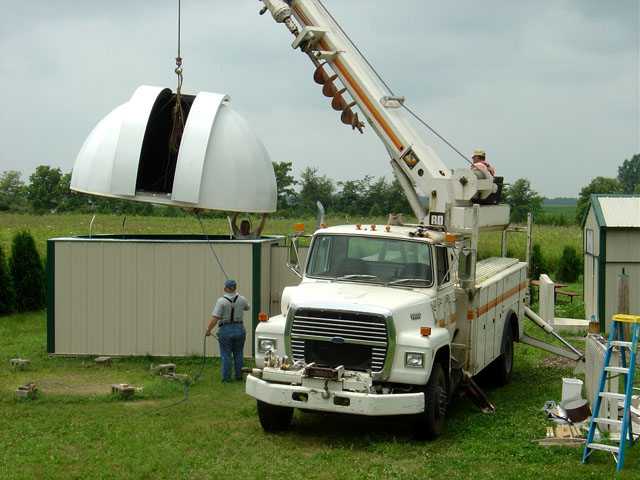
Finally it was time to raise the dome to the top of the base building.  A square frame of 2X4s was attached under the dome's bottom rim to support it during the lift  (you can see part of this in the second cable picture on the previous page).  After several false starts, on July 20 (which coincidentally happened to be the 5th anniversary of PGO's opening day), we finally got a crane truck large enough to lift the dome, courtesy of the Frankfort City Light&Power Utility:
Serious machinery.
That's me in the building holding up the dome (with a little help from the crane ;), as Hoppy guides it with a rope.

The curved struts sticking above the building walls were intended to help guide the dome as it was lowered, but I don't know if they helped much, being only 1"X1/8" aluminum, while the dome weighed somewhere near 1000 lbs.

You can see the ground worn nearly bare inside the circle of concrete blocks where the dome was built.

After the dome was lowered it was still resting on the 2X4 "lifting frame" on top of the base building.  To lower the dome the last few inches, I used 3/8" carriage bolts and T nuts in the building's "roof ring" to act as jackscrews.  Then the dome was raised slightly, the 2X4 lifting frame was removed, and the dome was lowered to within about 1" of its final height.

A long strip of garage-door weatherstripping was run around the building's roof ring.  This will go under the rim of the dome when it is finally lowered.

Encore Flooring donated the carpet and installation labor.

For the dome rollers, 8 5" garage door cable pulleys were bolted at the top of 8 of the 4X4 posts (those not in the corners) in the building walls.  The track is about 40' of  1/8"X2" aluminum, screwed to the lower inside edge of the dome's base ring (it's flexible enough that it doesn't need pre-bending).  The base ring is made of 3 layers of 3/4" plywood, so the inside diameter of the bottom layer is made 1/8" larger to help keep the track securely in place.
The metal strap where the track meets the roller is a finger guard.
The dome rolled so easily that we were able to motorize it using only a cheap power drill as the motor.  A system of chains and sprockets acts as a two-stage 16:1 gear reduction spinning a 10" rubber-tired wheel inserted in a slot in the roof ring to contact the bottom of the dome's base ring.  At full speed, the dome spins at an amazing 8 seconds/rev, which is alarmingly fast when you're inside.
The drill, sprockets, tire, and axles are mounted on a piece of plywood that pivots on a rod (left), and is spring-loaded on the right.
Four heavy 3/8"X2" metal straps were heated/beaten into tall squared "C" shapes, and mounted on heavy boards in the octagonal corners of the building (see above picture), with one of the short ends of the C extending under the corner board, and with the other short end extending over the dome's base ring, to act as hold-downs in the event of strong winds.

As mentioned earlier, we decided at the last minute to paint the dome with waterproof rubberized roof paint, but couldn't do it until after the dome was on the building.  Kramer's Lumber in Frankfort donated a weekend loan of a portable cherry-picker, so we got to take turns riding it while painting.  It had a maximum height of about 35', which is scary when it's not attached to a truck.  Welty Custom Exteriors of Frankfort donated the paint, and advice. 

While painting the dome exterior, the base building was covered with black plastic tarps.  The first coats of paint were black (Welty's told us it was the best) followed by white, but while the dome was painted black, with the lower building covered with black tarps and the shutters open, it bore a striking resemblance to a giant "Dome Vader".  Wish I had a picture...