The skeleton of the dome was made from 60 arcs cut from 10 4X8 panels of 3/4" plywood. Note the many curved scraps to the left.
First a giant jig was made to hold the panels and jigsaw. The radius arm at left is for a pencil to mark the panels, and the one on the right keeps the jigsaw on the line. But I started with a very old worn-out jigsaw and the sleeve bearing guides for the reciprocating shaft had badly worn the surrounding plastic in the saw housing, so the blade could easily drift off the line. With the saw held by the radius arm, it was difficult to correct. I disassembled the saw and managed some repairs, but it wasn't good enough, so we bought a new saw. But even then, jigsaw blades are thin enough that the wood grain could make the blade drift, so finally I gave up and just used the jig to mark the arcs, and guided the jigsaw by hand.
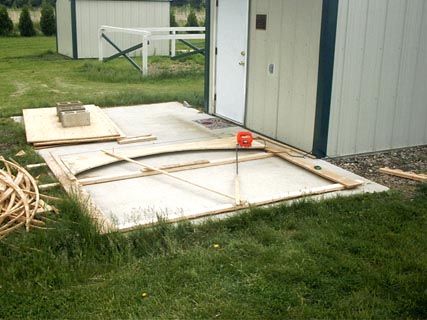
The base ring of the dome is made of three layers of arcs 5 1/2" wide, glued and screwed together. It took three arcs to make each layer. We needed a large flat surface to lay out the rings for assembly, and the only places convenient were the concrete floors of the either the Nature Center or the picnic shelter across from it. The doors of the Nature Center wouldn't be wide enough to remove the completed ring, but the floor of picnic shelter wasn't quite flat enough, being made of 6 10' square concrete slabs in a 2X3 array, with each slab tilted slightly away from the centerline of the floor for drainage, but the ring was going to be 13' diameter.
So we assembled the ring in the Nature Center, but didn't use glue (polyurethane construction adhesive) on two opposite sections, so that after the glue had set, the screws on these sections could be removed and the ring separated into two semicircles. Then the two halves were reassembled with glue on the picnic shelter floor, where enough of each half was on the same concrete slab to keep the whole thing level. Then with several extra volunteers we carried it back to the dome base building, and set it on 8 concrete building blocks. Shims were used later to level it, since the rest of the dome would be built on it here.
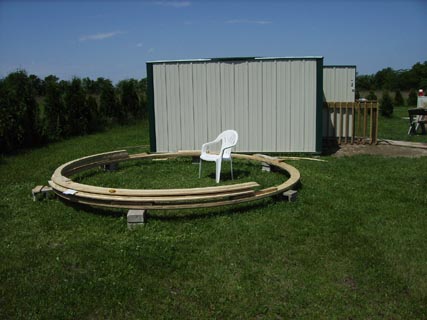
Then two semicircles were built in a similar manner (seen also laying down on top of the base ring above). These will form the main arcs of the dome, with one on either side of the shutter.
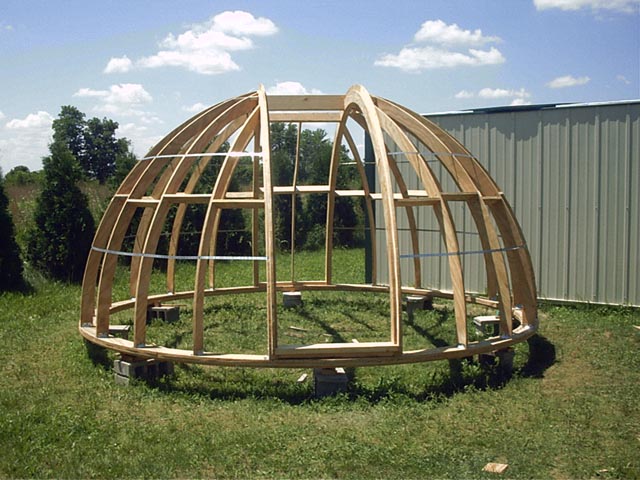
The dome gets three-dimensional, with the two main arcs and the first of the other ribs. Note that the center layer of the each of the 3-layer thick main arcs is wider than the outer layers, around the front shutter opening area of the main arcs. This projection will act as the lip for the shutters. WVAS member Bill Hayward, left, was our main extra volunteer for the whole project. He was out there for a full day nearly every weekend for the whole summer.
The skelton is done. 18 ribs total, not counting the main arcs. Construction took long enough that rain had gotten to the plywood panels and caused some warping, so cross braces were added about halfway up, and metal strap (the type used for hanging plumbing and ductwork) was added above and below. The strap is convenient because it has evenly spaced holes, so if you choose the height right you don't need to measure and drill all the holes.